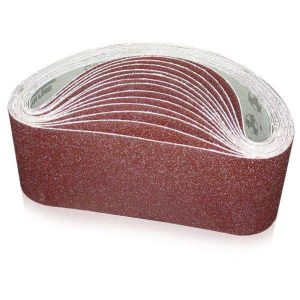
How to replace belts on a wide belt metal sander?
Feb 10 ,2025
Replacing belts on a wide belt metal sander is a critical maintenance task to ensure the machine operates efficiently and produces high-quality finishes. Below is a step-by-step guide to help you through the process:
1.Safety Precautions
Power Off: Disconnect the sander from the power source to prevent accidental startup.
Wear PPE: Use gloves, safety glasses, and protective clothing to avoid injuries.
Check Manual: Refer to the manufacturer’s manual for specific instructions and safety guidelines.
2.Tools and Materials Needed
Replacement sanding belts (correct size and grit).
Screwdrivers or wrenches (as required by your machine).
Allen keys or hex wrenches.
Cleaning cloth or brush.
Lubricant (if needed for tensioning mechanisms).
3.Step-by-Step Replacement Process
Step 1: Remove the Old Belt
Open the Machine: Locate and open the access panels or covers to expose the sanding belt.
Release Tension: Use the tension release lever or knob to loosen the belt. This reduces pressure on the rollers, making it easier to remove the belt.
Remove the Belt: Carefully slide the old belt off the rollers. Note the belt’s direction (usually indicated by arrows on the belt) for proper installation of the new one.
Step 2: Clean the Machine
Inspect Rollers: Check the rollers for debris, adhesive residue, or damage. Clean them with a cloth or brush.
Clean the Interior: Remove dust and metal particles from the machine’s interior to ensure smooth operation.
Step 3: Install the New Belt
Position the Belt: Place the new belt around the rollers, ensuring it aligns with the tracking mechanism. Follow the directional arrows on the belt.
Apply Tension: Use the tensioning mechanism to tighten the belt. Ensure it’s snug but not over-tightened, as this can cause premature wear or damage.
Check Alignment: Manually rotate the rollers to ensure the belt tracks correctly. Adjust the tracking mechanism if the belt drifts to one side.
Step 4: Test the Machine
Close Access Panels: Securely fasten all covers and panels.
Power On: Reconnect the machine to the power source and turn it on.
Run a Test: Let the sander run for a few minutes without load to ensure the belt tracks properly and there are no unusual noises or vibrations.
4.Troubleshooting Common Issues
Belt Slippage: Check tension and tracking adjustments. Ensure the belt is the correct size.
Uneven Wear: Inspect rollers for damage or misalignment. Clean debris from the belt path.
Excessive Noise: Verify that the belt is properly seated and tensioned. Lubricate moving parts if necessary.
5.Maintenance Tips
Regular Inspections: Check belts and rollers weekly for wear and alignment.
Proper Storage: Store replacement belts in a cool, dry place to prevent damage.
Use Correct Grit: Match the belt grit to the material and finish requirements.
More Metal Deburring Machine >>>


